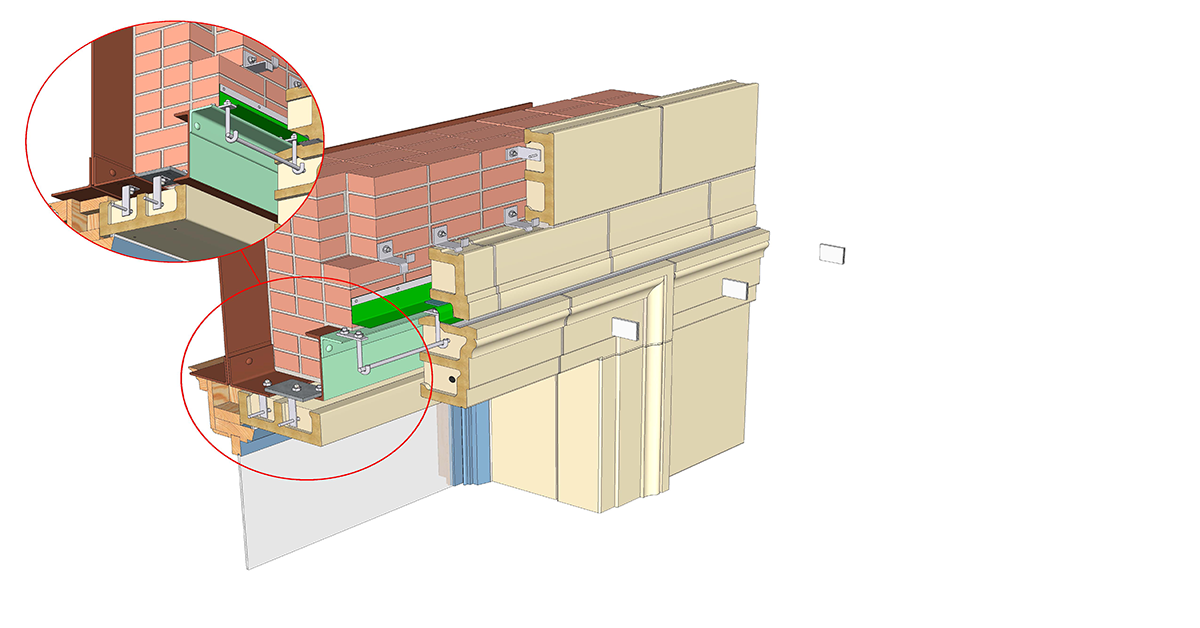
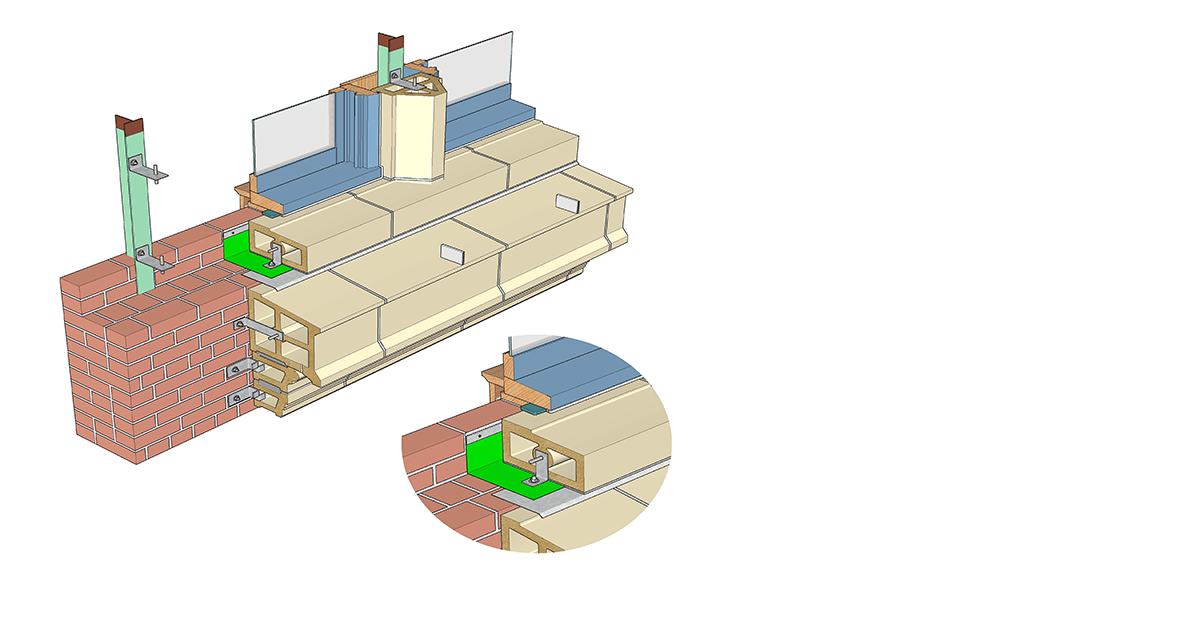
Terra cotta unit damage, such as spalling and cracking, that is too great to repair in situ may need full replacement. Replacement terra cotta units should have similar compatible properties to the original terra cotta. Replacement units that are stronger and denser, or have lower porosity and water absorption, or different thermal characteristics can cause premature future failures of the historic or existing terra cotta wall assembly. It’s generally recommended where terra cotta units are individually replaced in the main body of the facade that the replacement unit(s) be terra cotta.
Alternative replacement materials for terra cotta options include glass fiber reinforced concrete (GFRC), cast stone, fiber reinforced polymer (FRP), limestone, and metal. Each of these have different thermal coefficients and general properties that are different from terra cotta. Clay-based materials tend to expand slightly in place, where cementitious-based material tend to shrink. These materials are appropriate as replacements when an entire system of the wall is being replaced, such as a cornice, parapet, or belt course.
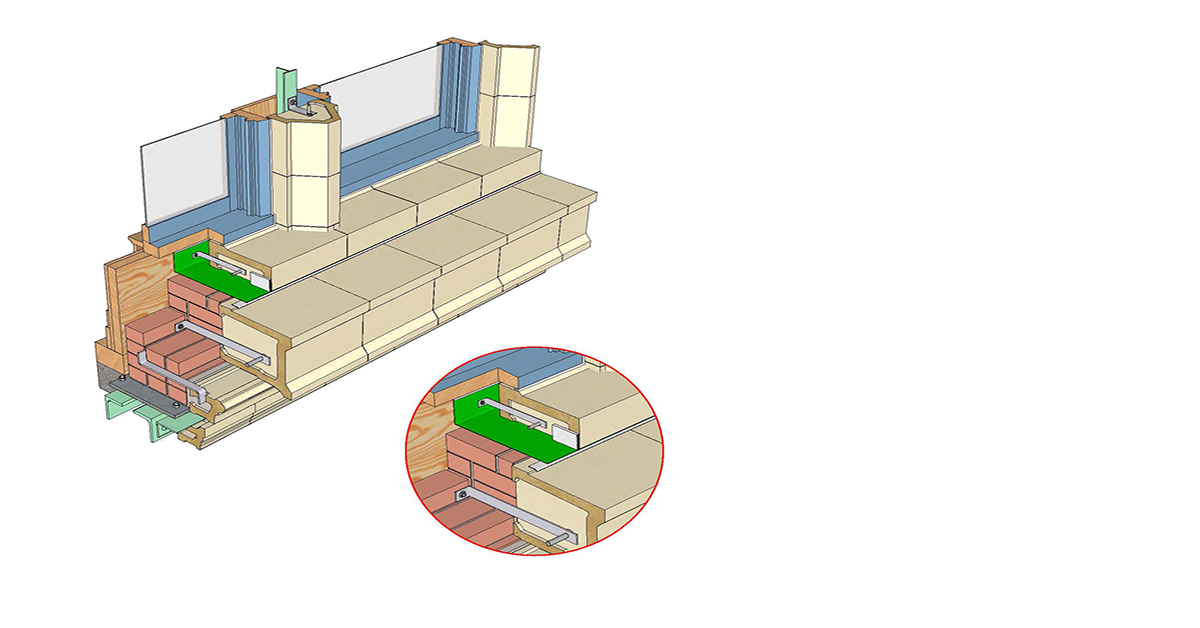
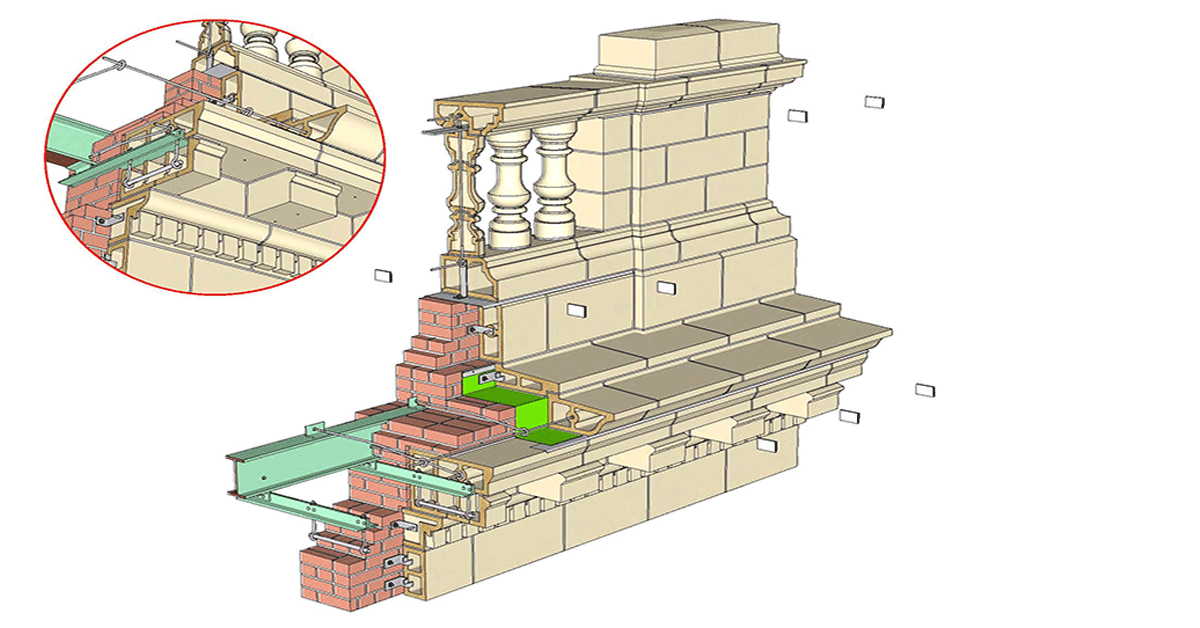
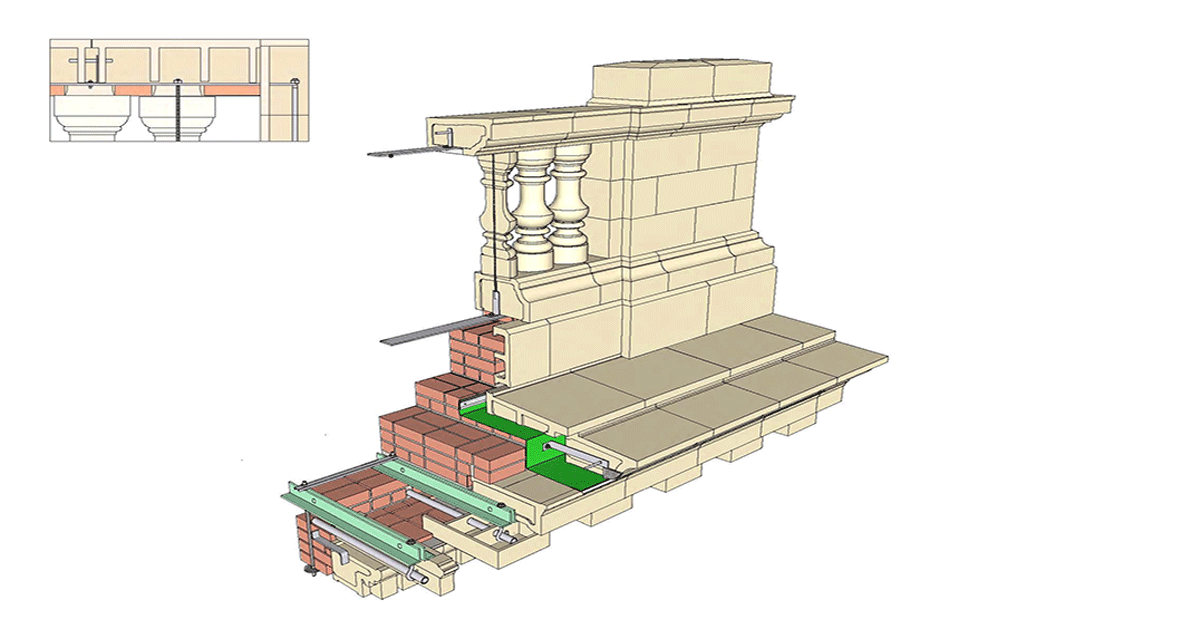
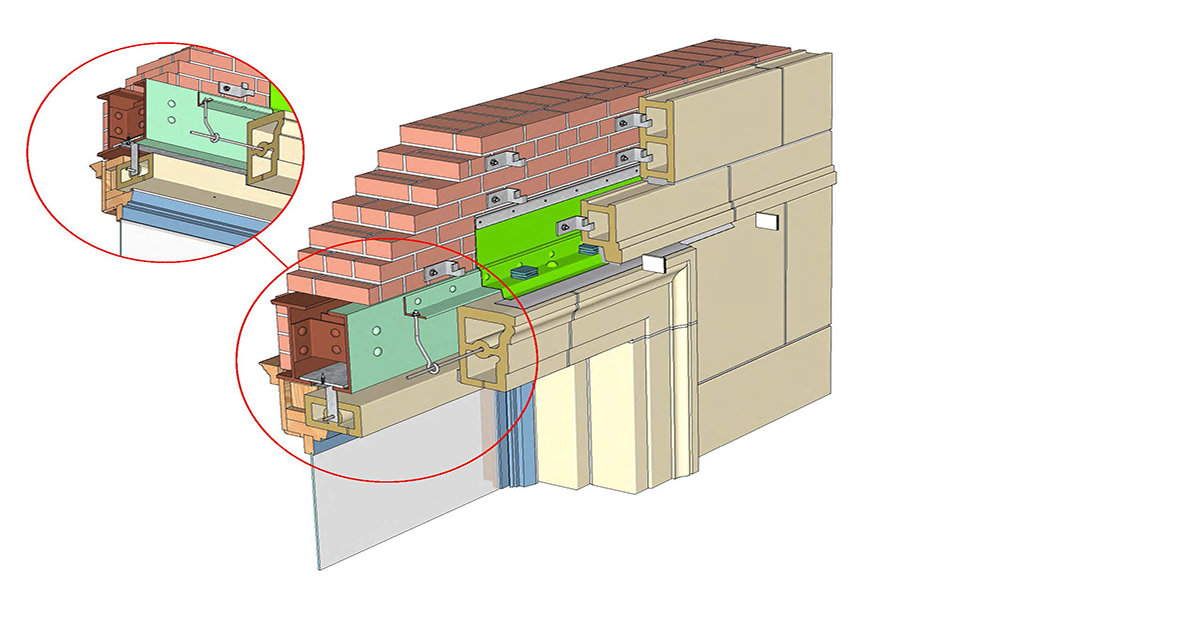
Most terra cotta facades were originally installed without flashings or water management. They also used mild steel anchors, which are prone to corrosion. For system replacement, it’s critical to integrate new stainless-steel anchors, steel protection (for example, a corrosion inhibiting coating), and a new flashing system that includes termination bar, membrane, drip edge, and weeps.
Check out IMI’s terra cotta detail series for examples of window sills and mullions, window lintels, and building cornices and parapets. Each set includes a depiction of original construction, pressed terra cotta replacement units, and extruded terra cotta replacement units.
Localized architectural terra cotta unit damage like spalls can be repaired in situ using cementitious composite repair mortars. These proprietary bagged material blends vary in the type of cementitious material, sand, and admixtures used. Latex and acrylic polymer admixtures are included in some of the mixes to assist with bond and limit shrinkage; however, polymers also lower the water absorption and may trap moisture behind the patch site. Review the product data sheets, or have the mixes tested, to select materials that have similar properties (like strength, density, porosity, water absorption) to the original terra cotta.
Best practice details for composite mortar repairs should include supplemental anchorage as illustrated in examples for small, medium, and large repair areas. Matching the repair mortar to the color of the terra cotta is recommended even if a coating is applied to the repair. As the coating deteriorates with time, the exposed patch color won’t be as visually obvious.
Crack repair options depend on if the crack is moving or stable and its width. If still moving, as determined with a crack gauge, then a flexible material, like sealant may be the appropriate. If the crack is no longer moving, then a more rigid repair material, like a mortar or epoxy may be the solution. Supplemental anchors may be required to secure each side of the crack, especially for wide structural-compromising cracks. Anchor type, size, and embedment depth need to be appropriately selected for the terra cotta, type of backup, and assembly configuration. Pull–out anchor testing should be required during mockups to ensure the anchor meets the lateral strength requirements, and continued testing during the project should be required for quality assurance. Expansion and rigid anchors aren’t commonly appropriate for clay terra cotta units, as they can cause damage.
Terra cotta, especially those exposed to the elements, should be treated with care as to not damage the finish. Abrasive and chemical treatments that damage the glaze or finish lowers its resiliency and can lead to premature damage. Maintaining a terra cotta masonry facade requires repair or cleaning treatments that don’t damage the surfaces. Protecting the terra cotta surfaces is important in retaining the historic character and aesthetic qualities of the material.
Matching the glaze and color of the original terra cotta can be achieved by working with the terra cotta manufacturers and reviewing samples. Note that there’ll be lead time to go through the sample and matching process. For in situ spall or crack repairs, these repair areas can be coated with an appropriately selected coating to match the original finish (for example, proprietary coatings and 100% solids acrylic). When coating a repair area, don’t coat the entire unit; coat to the perimeter of the repair material. Coatings won’t bond well to the glaze and will flake and peel off soon, leaving an undesirable finish. Adhesion testing mockups are important to select compatible materials that bond well and aesthetically match.
With repair and restoration projects, it’s important to understand the properties of the existing terra cotta wall system, material properties, and anchorage prior to selecting replacement materials and repair strategies. The following is a list of field and laboratory testing that may be needed for terra cotta facade evaluation. Often, brick testing is modified for use with terra cotta.
FIELD TESTING:
| | |
| - Thermal and moisture properties
| - Non-Destructive Evaluation (NDE)
|
LABORATORY TESTING:
- Compressive Strength, Density, Porosity
| - Water absorption – cold and boiling
| | |
| | - Salt/deposit identification analysis
| |

